Precision Inspection Techniques for Complex Contour Parts in CNC Turning
Understanding Contour Complexity and Inspection Challenges
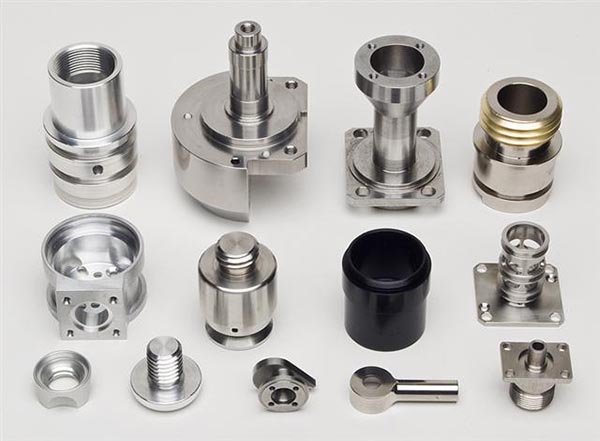
Complex contour parts in CNC turning often feature irregular geometries, such as multi-radius curves, tapers, and grooves, which demand precise dimensional control. Unlike simple cylindrical components, these parts require inspection methods capable of capturing variations in both linear and angular dimensions. Challenges arise from tool deflection, thermal expansion, and programming inaccuracies, which can distort measurements if not addressed systematically.
For example, a part with varying diameters and radii may exhibit inconsistent surface finishes due to tool pressure changes during cutting. Inspection must account for these dynamic factors by using adaptive measurement techniques. Traditional linear gauges may fail to detect subtle deviations in curved sections, necessitating specialized approaches.
Multi-Sensor Coordinate Measuring Machines (CMMs) for 3D Analysis
Coordinate measuring machines equipped with touch-trigger and laser scanning probes offer comprehensive 3D analysis of complex contours. These systems capture point clouds along the part’s surface, enabling detailed comparisons against CAD models. Laser scanning excels in detecting surface irregularities on freeform shapes, while touch probes provide precise location data for critical features like holes or slots.
When inspecting a part with compound curves, operators should prioritize sampling density in high-stress areas, such as sharp transitions between radii. Scanning speed must balance accuracy and efficiency; overly rapid scans may miss micro-level defects, while excessively slow scans prolong inspection time. Data processing software plays a crucial role in filtering noise and highlighting deviations beyond tolerance thresholds.
In-Process Gauging for Real-Time Feedback
Integrating in-process gauging systems into CNC lathes allows for real-time dimensional monitoring during machining. These systems use non-contact sensors, such as eddy current or laser displacement probes, to measure part features without interrupting production. For complex contours, multiple sensors can be positioned to track different sections simultaneously, ensuring uniformity across the part.
A key advantage of in-process gauging is its ability to detect tool wear or programming errors early. For instance, if a sensor detects a gradual shift in diameter during roughing, the operator can adjust cutting parameters before the error propagates to finishing stages. This proactive approach reduces scrap rates and enhances first-pass yield. However, sensor calibration must align with the part’s material properties to avoid false readings.
Optical Comparison Techniques for Surface Profile Accuracy
Optical inspection methods, such as structured light scanning or white-light interferometry, provide high-resolution surface profile analysis. These techniques are particularly effective for parts with micro-features or tight tolerances, where traditional contact methods may introduce measurement errors. Structured light systems project patterns onto the part’s surface and analyze distortions to reconstruct its 3D shape.
For parts with textured or reflective surfaces, anti-glare coatings or diffused lighting may be required to improve scan quality. Optical inspection also enables rapid comparison of multiple parts against a master reference, identifying batch-level inconsistencies. When evaluating a part with intricate grooves, operators should focus on edge definition and depth uniformity, as these areas are prone to tool chatter or material springback.
Thermal Stability and Environmental Compensation
Thermal expansion is a significant source of error in precision contour machining. Fluctuations in ambient temperature or machine heat generation can cause part dimensions to drift beyond tolerances. To mitigate this, inspection should occur in a temperature-controlled environment, and measurement devices should incorporate thermal compensation algorithms.
For example, a part machined at 20°C may expand by 0.01mm if inspected at 25°C, depending on the material’s coefficient of thermal expansion. Advanced CMMs and gauging systems can adjust readings based on real-time temperature data, ensuring accuracy across varying conditions. Operators should also allow parts to stabilize thermally before inspection, particularly for long-run productions where heat accumulation is inevitable.
Software-Based Tolerance Analysis and Reporting
Modern inspection software integrates geometric dimensioning and tolerancing (GD&T) rules to evaluate part conformance. These tools analyze measurement data against specified tolerances, flagging deviations and generating detailed reports. For complex contours, software can decompose tolerances into individual features, such as circularity, straightness, or angularity, providing actionable insights for process improvement.
When inspecting a part with multiple interacting tolerances, operators should prioritize critical-to-quality (CTQ) dimensions. For instance, a shaft with tight runout requirements may need more frequent sampling than a non-critical flange. Software simulations can also predict how dimensional variations affect part functionality, guiding decisions on whether to rework or scrap non-conforming components.
By combining multi-sensor CMMs, in-process gauging, optical techniques, thermal compensation, and software analysis, manufacturers can achieve precise inspection of complex contour parts in CNC turning. This integrated approach ensures dimensional accuracy, reduces rework, and maintains consistency across high-volume or custom productions.


